Monday, August 27, 2012

Yeasted Honey Biscotti di Miele

There's nothing better than the smell of baking bread,
Unless it's mixed with the smell of baking cookies.


I made bread on Monday and my family devoured the honey wheat loaf, so I figured it was time to make these biscotti di miele.
They're essentially honey wheat bread in cookie form, made with whole wheat flour, just a ad of honey, and then rolled in coarse raw sugar before baking.
These remind me of something I would have eaten as a little kid after one of my Dad's Saturday Domino's runs. I've always been partial to the hardly sweet Italian cookies, and these are no exception.
They're so old world tasting, it's hard to believe Nonna didn't make them for you.

If you're afraid of yeast, this is a great practice recipe for you because it has a yeast in comparison to flour (pretty much guarantees that it will rise) and the second rise is in the fridge, over night. You can even leave it for up to 24 hours, so there's no need to worry about leaving it for set times, like most bread recipes.
The Perfect Little Cookie to Snack on While Blogging

These biscotti are not overly sweet, beautifully caramelized on the outside, and have a unique texture that you are guaranteed to crave after you make these for the first time.
They're like a soft breadstick, with a a caramel-honey flavor, and a bit of yeast on your tongue after you swallow.

Biscotti di Miele
Makes about 24 cookies, depending on the size of your cutter

1 1/2 cups whole wheat white flour
2.5 tbs cold butter, cut into cubes
2 tsp dry active yeast
1/2 cup warm water (105º)
1/4 cup honey, 1 tsp set aside
pinch of salt
about 1/3 cup turbinado sugar for rolling

In a small bowl of cup, dissolve the yeast in the water with 1 tsp of honey. Let the mixture it for 5 minutes, until foamy. Add the rest of the honey and mix well.
In a medium bowl, mix the flour and salt with a fork. Add the cubed butter and cut into the flour with a fork or pastry cutter, until the mix is crumbly.
Add all of the yeast mixture to the flour and mix until the dough starts to form a ball.
Cover the bowl with a kitchen towel and allow it to sit and rise in a warm place for an hour, or until doubled in size.
After an hour, punch the dough down and transfer to the refrigerator, covered with plastic, to rise over night.
The next morning, roll the dough to about 1/4" thick, on a floured surface. Cut the cookies into circles, then cut the circles into 1/2 circles. You can re-roll the dough 2 times (3 times maximum)
Roll the half circles in turbinado sugar, twist into a stand and pinch the edges together to form a twisted ring.
Lay the cookies on a parchment lined baking sheet. Allow to rise, uncovered for 5 minutes. Preheat your oven to 350ºF.
Twist the cookies one more time before baking for 10-15 minutes, until golden and crisp on the outside.
They should develop a crust that resembles a vey thin bread crust.

Monday, August 20, 2012

The Nervous Bakes

Some people get the nervous shakes. 
Or the nervous giggles.
I get the nervous bakes.
This leads me to do regrettable things, like attempt a batch of yeasted, flourless, sugarless, banana-oat bread at 1:30am.
Than a new recipe for chocolate peanut butter cookies at 2am. When I'm on a diet. 

I didn't realize I was nervous until I emptied the too-large jar of yeast, busted out the peanut butter and began mixing even though there were dirty dishes still in the sink.
I didn't realize I was nervous until I started planning a cookie spree instead of tomorrow's workout (I stopped that one dead in its tracks)
I didn't realize I was nervous until I started using Punchfork like a stress ball, scrolling farther and farther down the page with every squeeze of my heart, each clench of my stomach.
I didn't realize I was nervous until 20 different people asked me if I was nervous. I told them 
No.
I'm fine.
Excited.
Just fine.

Then I went a little nuts.
In the kitchen-with the rubber spatula and metal bowl I will have to leave behind.
With the oven knob and the tablespoon measure.
With the plastic wrap and tiny tasting spoon.

But now I know. I know I'm nervous. 
I know I screwed up. I know that tomorrow I will finally pack.
And finish that survey. And find my passport.

Oh, and I have some cupcakes to make, too.

Sunday, August 19, 2012

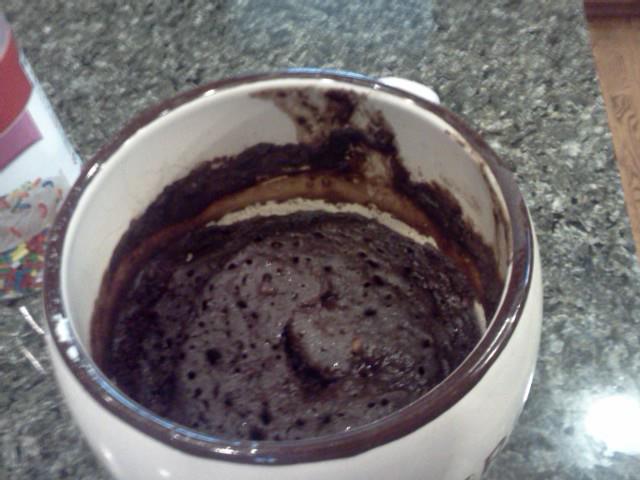
Hug in a Mug Brownie Pudding (single serving)

A single girl molten chocolate pudding cake for when you need a chocolate hug.
I'm going to keep this post short because I know you don't need an anecdote, or bossy directions. 
Good.
You need help.
You need a hug.
You need chocolate.
You need all this things now.
Here it is, a Hug in a Mug:
Better with Warm PB Sauce

Hug in a Mug:
Serves 1

5 Tbs unsalted butter, melted
1 large egg
1/4 cup of sugar
2 Tbs cocoa powder
1 1/3 Tbs all purpose flour
2 Tbs unsalted butter
2 Tbs heavy cream
1/4 cup sugar
1/2 tsp vanilla extract
1 1/2 tsp sea salt


Because some colorful sprinkles will make you smile
Preheat oven to 325ºF and grease 1 ramekin or oven safe mug.
Beat the egg and 1/4 cup sugar until very thick and pale yellow in color (5-10 minutes)
In a pan, bring 1/4 cup sugar and 2 Tbs water to a boil. Cook, not stirring until dark caramel in color. Remove from the heat and add 2 tbs butter and heavy cream, whisking well to incorporate. Add the vanilla extract and salt and reserve 1-2 tbs caramel.
Whisk together the flour and cocoa powder until there are absolutely no lumps. Slowly add the butter and flour mixture to the eggs, folding together with a rubber spatula, fold in the caramel still in the pan.
Pour into a greased ramekin and bake  for about 20 minutes (the top should be cracked but the inside should be fairly liquid)
Cool for 5-10 minutes before eating, while still very hot, topped with the reserved caramel.

Thursday, August 16, 2012

Whole Wheat Pita Bread

I know, it's strange how much bread I've been baking in August.
Bread is my de-stresser, my therapy, my physical outlet (I firmly believe of the throwing of dough on the counter)

I made 2 different types of bread this morning-to-afternoon.
Whole wheat pita, and cranberry walnut bread, both are to be gifted away.
There's something very grandmotherly about giving somebody a loaf (or stack) of bread for a gift. Unlike brownies or cookies, nobody can assume it was made from a mix or prepackaged dough, it has a certain heft that makes me feel like it actually counts as a gift.

Now that I'm finished singing the praises of loaves of bread, let's sing about flatbread, specifically the pita.
Boy, oh, boy, the pita! Firm, bubbled, pocketed vessel of hummus.
Baked into chips, used to clean out the bowl of spicy soups, simple to make, and so fun to shape from little balls into rounds.

These hold flavors beautifully, garlic, herbs, even a little parmesan cheese can be added to the top or middle of the rounds for a more flavorful bread, but that'll be another post. For now, we'll focus on plain pita, hummus' favorite friend.

Whole Wheat Pita
Makes 16 (2 oz) pitas

3 1/2 cups white whole wheat flour
3/4 cup warm water (105-110ºF)
1 tbs dry active yeast
2 tsp sugar
2 tsp salt
2 tbs olive oil, divided

In a small bowl or measuring cup, mix the water, sugar, and yeast. Let the mixture proof for 5 minutes, or until foamy. If the mixture does not foam, repeat this step with new yeast.
In a large bowl, mix the flour and salt. Add the yeast mixture and 1 Tbs of olive oil to the flour.
Mix with a fork until thoroughly combines (about 3 minutes)
Turn the dough out onto a floured surface and continue kneading for about 6 more minutes, until the dough is smooth and elastic.
Form the dough into a ball and coat with the remaining oil. Place back in the mixing bowl, and allow to sit, covered with a warm kitchen towel, for about an hour and a half, or until doubled in size.

Once risen, preheat the oven to 500ºF and turn the dough out onto a clean work surface.
Divide the dough into quarters, careful not to press the air out of the dough.
Flatten each quarter into a square, about 1 inch thick, and cut the square into quarters.
Roll the 16 pieces of dough into balls. Cover the balls with a kitchen towel and allow to rise again until slightly risen, about 20 minutes.
After the second rising, roll the dough into 6 inch rounds on a floured surface and place on a heated pizza stone or bottom of an overturned baking sheet.
Cook the pitas for about 2 minutes, or until puffed.
Eat with hummus, bake into chips, use to soak up soup; enjoy them in whatever way you please!

Wednesday, August 15, 2012

Beet and Clementine Salad

Sometimes you've just got to eat dirt. Whether it's a mushroom, a beet, or almost any other root veggie, the foods that taste like dirt are oddly appealing to me.
The beet has been especially crave worthy lately, and I've been eating them like crazy.

I like that they're healthy
I really like their deep red color
I'm a fan of their versatility
Heck, I love that they taste like dirt.

I really love they they're good for you, and have been eating them like crazy for the past week or so.
Roasted, boiled, and raw beets with balsamic vinegar are great for a while, but eventually, they need something else. That's when you make a beet salad.
This is one of my favorites, with sweet citrus, creamy avocado, earthy beets, peppery arugula, and nutty sunflower seeds, this salad is almost overwhelming in that it hits every last tastebud.
It may be complex in flavor, but it's one of the easiest salads to make--perfect for a brown paper lunch bag, a summer picnic, or a more formal dinner.

Beet and Clementine Salad
Serves 4

16 cups (one large bunch) arugula, rinsed and dried
8 steamed baby beets, quartered (you can find prepared beets at Trader Joe's)
2-4 clementines, peeled and segmented
1/4 cup shelled sunflower seeds

Dressing
Makes 1.25 cups
1 ripe avocado, peeled and seeded
2/3 cup of water, divided
1 tsp lime zest
3 Tbs lime juice
2 chopped green onions
1 clove of garlic
1/2 tsp cayenne pepper (or to taste) 
Salt and Pepper to taste

In a large boll, toss the greens, beets, and clementines.
In a blender, puree the avocado, 1/2 cup of water, lime juice and zest, onions and garlic until smooth. Add more water if the mixture is too thick. 
Taste and add salt, pepper, and cayenne until seasoned to your taste (I used about 1/2 tsp of each)
Divide the salad onto 4-6 plates, top each with 1-3 Tbs of dressing and a tablespoon of sunflower seeds.
Enjoy!


Sunday, August 12, 2012

Soft Earl Grey Shortbread Biscuits

I don't think of myself as an elegant person. I have yet to master any sort of glide, I don't own a hair dryer, and I have been known to wear yoga pants for more than 24 hours in a row.
I have my elegant moments, though.  I'm a bit of a mascara pro, I don't cry in public, and I firmly believe that you must wear heels to work.

Oh so Elegant

These cookies are a bit like me. I identify with these cookies. I know that sounds super strange and possibly creepy, but I already know I have an abnormal relationship with food, so say what you please.
These cookies sound refines and elegant, but are super easy to make, and taste a bit like the crust of a PopTart (Thanks, Sis, for that observation)

They are complex in that the taste and texture are familiar, but also new, as the pepperiness of the tea sits in contrast with the simplicity of the white sugar and flour.
They're hard to explain, easy to make, and amazing to eat. They sound fancy, impress guests, but are also right at home clutched in a toddler's fist.
They're like people, they have many different moods, and sides, and they always have a place on the cookie platter.

Soft Earl Grey Shortbread
Makes about 24 cookies

4 oz cold butter, cut into cubes
6 oz flour
2 oz + 2 Tbs white sugar
2 Tbs Earl Grey Tea (from a tea bag is fine)
1/3 cup skim milk

Preheat your oven to 375ºF and line 2 baking sheets with parchment paper.
In a food processor, pulse the butter, sugar and flour until they form a dough with a texture similar to pie crust. Don't worry if your butter gets too small, it doesn't make too much of a difference in this recipe.
Pour your milk and 1/2 Tbs of the tea into a small microwave safe dish and heat on high for a minute to a minute and a half, or until the milk is just about to boil.
Allow the tea to sit and steep in the milk for just about 2 minutes before adding to the food processor in a slow stream, while pulsing.
As soon as the milk is incorporated into the dough, fold in the remaining tea leaves (you may have to transfer your dough to a larger bowl and crumble it up a bit for more even distribution.)
Chill the dough on the counter overnight.
Flour a board and roll your dough out to about 1/4 inch thick. Use a 2 inch round cookie cutter (or the size  of your choice) to cut the dough into your desired shapes, continually rolling out any dough scraps.
Bake on parchment lined baking sheets for about 15 minutes, or until the cookies are just getting a pale golden cast around the edges.
Enjoy!

Friday, August 10, 2012

Sweet Garlic Rasted Zucchini

As you may have notices, it's the time of year I like to refer to as Zuccinipocalypse. Zucchini is literally taking over the world. And I love it.
Zucchini is my absolute favorite vegetable, and when I can get it perfectly sweet and in season, I get very very excited. I know, I'm a lame.
When I say it's my favorite veggie, I don't mean I enjoy the oily grilled vegetable medley that's served at my grandparents' favorite restaurant. I actually hold this dish responsible for turning so many people against my little green friend.
No, no, no, I like my zucchini grilled until the inside is just warm but still crisp, sautéed with lemon and lots of black pepper, raw with nothing on it. Yep, I know, I'm a lame.
I'm not even going to start talking about cakes, breads, or brownies. That would just be too much.
But my favorite way of eating this favorite veggie (essentially one of my favorite vegetable dishes) is Sweet Garlic Roasted Zucchini.

The zucchini is marinated in salt and lots of grated garlic, the roasted in 2 rounds. Once without any oil, at a lower temperature, then once with just a sheen of the good stuff at a higher temperature, so it get's golden and crisp.

The salt draws out any bitterness in the zucchini, allows the garlic to cook slowly in the oven, preventing any possibility of burned bitter garlic, and makes the dish super sweet.
The second roasting makes the sweet veg golden and crisp. Yum.

Try this dish with your non-zucchini loving friends to turn them on to a lifetime of zucchini love. I promise, it will work.

Oh, and this also works wonderfully with yellow summer squash, or a combination of both if you want to get really fancy with it.

Sweet Garlic Roasted Zucchini
Serves 4

4 medium zucchini (or 30 baby zucchini)
4 cloves of garlic, grated
2 tsp sea salt, faked or ground

1 Tbs olive oil

Preheat your oven to 350ºF and line a baking sheet with parchment.
Chop the zucchini into bite sized pieces, or cut baby zucchini length wise, so you have 2 long halves.
Toss zucchini in a bowl with grated garlic and salt. Allow the mixture to marinate at room temperature for 20 minutes.
Spread the zucchini evenly on the lined baking sheet and bake at 350ºF for 10 minutes, stirring half way through.
After 10 minutes, or when the zucchini are just beginning to feel tender, remove from the oven and toss with 1 Tbs olive oil, making sure any and all garlic bits are also tossed with the oil.
Heat oven to 400º and return the zucchini to the oven for another 10-15 minutes, until golden and crisp on the cut side, turning half way through.
Serve alongside Pollo in Pomodoro, atop risotto, or tossed with spaghetti alla carbonara.
Enjoy!