Showing posts with label sundaysweeties. Show all posts

Sunday, November 11, 2012

Cranberry Walnut Bread

The "Wine and Cheese Party" has long been a staple of Bonaccorsi family meals. These "parties" are the dinners where we cut up bread, apples, and all our favorite cheeses and sit around the kitchen counter, snacking up a storm. If we're feeling really fancy, we'll occasionally bust out the shrimp cocktail. No matter how fancy or casual we're feeling, though, there's always a loaf of cranberry walnut bread from Whole Foods. Actually, there are two loaves, because this dream bread heats up like a dream for the next day's breakfast.

I have strong feelings about this bread and wanted desperately to make it myself while I was still in my bread making craze. When I looked up the recipe online, though, I found that the recipe for the exact Whole Foods bread isn't the greatest thing for your health (which is probably why it's so delicious) I decided to spruce it up a little.
This version uses whole wheat flour, a lot less sugar, and apple sauce instead of the fats that the traditional recipe.
I am seriously considering making this bread again and bringing it to Thanksgiving dinner with me, but that might be a little much as I am already responsible for the cranberry sauce (recipe to come). If you're hosting the meal this year, I strongly encourage you to make this bread--the smell alone is totally worth it!
I hope you love this bread as much as we do, whether you serve it at a feast or a wine and cheese party.

Cranberry Walnut Bread
Makes 2 round loaves

3 1/2 cups white whole wheat flour
1 tsp salt
2 tbs sugar
2 tbs honey
1/4 cup chopped walnuts
1/4 cup dried cranberries
1 tbs unsweetened apple sauce
1 cup milk (I used almond milk)
5 tbs butter
1 Tbs dry active yeast

In a small pot or microwave safe bowl, heat the milk and butter until the butter is melted. Cool the milk Add the sugar and honey, and mix until dissolved.
All ow the mixture to cool until it is warm (105-110ºF), then mix in the yeast. Allow the mixture to sit for 5 minutes, or until the milk bubbles through the butter layer on top.
In a large bowl, mix the flour, salt, nuts, and cranberries.
When the yeast has proofed, add to the flour mixture, along with the apple sauce. Mix with a fork until thoroughly combined.
Turn out on a floured surface and knead the dough well for about 8 minutes, until the dough is smooth and elastic.
Form the dough into a ball and cover with flour. Place the dough back in the bowl, cover with a kitchen towel and allow to sit until doubled in size, about an hour and a half. *If you need to move a little more quickly, you can let it rise for an hour, but the longer it sits, the more the flavors will develop.*
Preheat the oven to 400ºF
When the dough is risen, turn it out onto a floured surface and knead for 1 minute.
Divide the dough into 2 balls and allow them to rise, covered, for 30 minutes.
Bake the 2 balls on a pizza stone or parchment lined sheet for 15 minutes, then lower the heat to 350ºF and continue baking for another 45 minutes.
Remove from the oven and allow to cool to nearly room temperature before slicing.
Enjoy!

Sunday, November 4, 2012

I Miss You, so Here's a Plum Cake

Hey all! I've gotta say that only posting ince a week s killing me in a small way. I miss the days when I would come home from work, crank up the oven, oblivious to the summer heat, and bake, cook, simmer, and steam almost every day of the week. I'm lustful for the days of spontaneous meringue-ing, baking brownies in the middle of the night. Oh, and this early November snow? I'm finding my hands subconsciously rotating like I'm stirring soup.
I'm an addict. This is withdrawal. It's bad, bad, very bad.

There is light at the end of the tunnel, though. THANKSGIVING IS COMING! This means day after day of shameless cooking. Cranberry sauce, mashed potatoes, pot pies, crumbles, smoothies, and custards are all coming your way in the very near future. Oh, and I get to make all the dishes to satiate your sweet tooth every sunday from Thanksgiving until Christmas--an even longer period of shameless cooking with even more spices!
See how dark the batter is? That's from all the vanilla!

I miss you--writing these posts, thinking of new ideas--just as badly as I miss my pink rubber spatula back home. Because I miss you and you're even more fantastic than Christmas cookies and sweet potatoes (the highest of praise in my book) I made you a plum cake. Gone are the days when prunes were the dreaded black, crinkly rocks in the very back of the cabinet. Soaking the prunes in warm milk, and folding them into a thick, vanilla scented batter brings them to life like you wouldn't believe. So bake up, eat up, and enjoy a deeply vanilla cake with bursts of sweet and savory prunes.

Vanilla Plum Cake
Makes 1 9 inch cake

1 cup all purpose flour
1 1/2 tsp baking powder
1/2 tsp salt
1/4 cup unsalted butter, softened
1/2 cup sugar
1 large egg
2 tsp vanilla extract
1/2 cup milk
1.5 tsp lemon juice or apple cider vinegar
6 large prunes

Preheat the oven to 400ºF, and prepare 1 9-inch cake pan by greasing, lining with parchment, greasing again and dusting with flour.
In a microwave-safe bowl, heat the milk for 1 to 2 minutes, until it's very hot but not boiling. Add the prunes to the hot milk and set aside.
In a mixing bowl, whisk together the flour, baking powder, and salt.
In a large mixing bowl, cream together the butter and flouw until light and smooth. Add the egg and vanilla, mixing until well incorporated. Remove the prunes from the milk when they are plump and softened. Add the lemon juice to the milk and mix.
Add 1/2 the flour to the butter and egg mixture, when it is fully combined, add half of the milk. Add the rest of the flour and milk, mixing well.
Pour the batter into the prepared pan and scatter (or carefully arrange) the prunes in the batter. Lightly cover the tops of the prunes with more batter to prevent burning.
Bake at 400º for 20-25 minutes. Allow the cake to cool in the pan for at least 10 minutes before turning out to slice.
This cake is great served at any temperature, but is at its best when served warm!


Sunday, October 28, 2012

Gluten Free Chewy Chocolate Chip Cookies

These cookies were a challenge to myself.
I sometimes do that, set random challenges for myself when I am bored.

This time around, I wanted to make my favorite thing ever: A Chocolate Chip Cookie
The rules were: I needed to use up the rest of my glutenous rice flour, left from mochi making
                         I needed to make something totally gluten free without a trip to the grocery store
                         I needed to make something with browned butter. And 1 bowl. (Mix in the pot!)
                         I needed to make something that I would want to eat myself.
My chips were a little...huge

These cookies are chewy! There's really no other way of describing them, other than beautifully caramelized, golden with browned butter, and extra soft from extra brown sugar.
Really, though, they're the chewiest cookies I've ever had. I love it!
The recipe may seem a little confusing as they are gluten free cookies, made with glutenous flour. This description is just of the texture of the flour, not the actual gluten content.

I sometimes find the texture and taste of rice flour a little too starchy and just a little off, but the toastyness of the browned butter, the slightly caramelized sugar, and chunky chocolate (something I usually don't go for in chocolate chip cookies) meld so well together, and really counteract any white-starch taste that could otherwise lead to a pasty cookie.
Browned Butter and Brown Sugar

Gluten Free Browned Butter Cookies

1 stick of butter, browned
1 stick of butter, softened
1 1/2 cups brown sugar
1/4 cup white sugar
2 eggs
2 tsp vanilla extract
3 cups + Tbs glutenous rice flour
1 tsp baking powder
1 tsp salt
12 oz semisweet chocolate chips or chopped chocolate

Preheat oven to 350ºF, and line 2 baking sheets with parchment paper. Cream the softened butter and white sugar until fluffy.
Brown the other stick of butter in a medium sauce pan. Quickly mix in the brown sugar and mix well, until some of the sugar has totally dissolved. Allow the mixture to cool to room temperature.
Beat in the softened butter and white sugar and add the eggs one at a time, beating until well combined. Add the vanilla.
In a separate bowl, combine the flour, salt and baking powder. Whisk out any lumps in the flour, and to combine.
Add the flour mixture to the butter and sugar, mixing well with a rubber spatula. Gently fold in the chocolate chunks.
Portion the dough into 1 inch balls and refrigerate for 1 to three hours. Place chilled dough on the cookie sheets and bake for 9 to 12 minutes, or until lightly golden around the edges but still soft in the middle.

*These are slightly different from standard cookies, in that they can be under baked. I know, it's a great shock, but it's true. Rice flour has a slightly starchy consistency so if it's under baked the cookies will taste a bit off. Letting the dough sit and meld in the fridge will help a lot with this, so make sure it gets at least 1 hour to chill*

Saturday, October 13, 2012

Pumpkin Cookies with Brown Sugar Glaze

Sometimes things are best left untouched. I can never resist messing with a recipe that I already love, making it vegan, gluten free, or otherwise "alternative". Some of these attempts are more successful than others, much more successful.
Take, for example, the humble pumpkin cookie. These classic cakey treats are the epitome of an adaptable recipe. They're also the epitome of delicious. This past weekend, I was home from school for fall break and I decided that pumpkin cookies were needed, and that they would be made without eggs, any form of fat, and minimal sugar.

Needless to say, they came out tasting exactly as you would expect a cookie that was essentially flour, spices, and pumpkin puree to taste. They had the texture of rubber cement and tasted of somehow overly sweet pumpkin skin.
They were bad.

Luckily, I didn't use all the pumpkin puree, so I was able to whip up a batch of the highly favored original recipe. Unlike my little mounds or orange rubber, these cookies are cakey, surprisingly light in texture, and so fragrant you're going to wonder how you can use them as air fresheners (all you can do is bake more). They're deeper and darker than a standard pumpkin cookie because of the brown sugar and molasses. These burnt orange beauties are a fall classic, tying together the holiday taste of gingerbread and the homey taste of pumpkin, perfect for an afternoon treat with a cup of coffee, milk, or hot cider.

Pumpkin Spice Cookies with Brown Sugar Glaze
Makes 24 cookies

2 1/2 cups all purpose flour
1 1/2 tsp baking powder
1 tsp ground cinnamon
1/2 tsp ground ginger
1/2 tsp salt
1 cup light brown sugar, lightly packed
1/4 cup molasses
6 Tbs unsalted butter, softened
1 cup pumpkin puree
1 large egg
1 tsp vanilla extract

Preheat your oven to 350ºF and line 2 baking sheets with parchment paper.
In a medium mixing bowl, mix together the cinnamon, ginger, flour, salt, and baking powder. In another bowl, cream together the butter, sugar and molasses until light and fluffy. Add the pumpkin, vanilla, and egg and stir until thoroughly combined. Add the flour mixture and stir mix well, using a rubber spatula to scrape down the sides and bottom of the bowl.
Drop by rounded tablespoon-and-a-half-fulls on your lined baking sheets and bake until the edges are firm, about 15 to 18 minutes. Remove from the oven, cool on the pan for 5 minutes before transferring to a cooling rack for glazing.

Glaze:
3 Tbs unsalted butter
1/2 cup light brown sugar
1/4 cup milk
1 cup powdered sugar
Bring the first 3 ingredients to a boil in a small pan, stirring. When the mixture deepens in color, after about 2 minutes, remove from the heat and add the powdered sugar and stir until it cools slightly. When the glaze is still warm, drizzle it over the tops of the cookies.

Wednesday, October 3, 2012

Amaretti Cookies

When I was a little kid, my dad would go to Domino's bakery every Saturday morning. It was a small Italian pastry shop near my house, and every trip was the highlight of my week. Even the dog loved the trip in the car. Every Saturday, Joe Dad would put on his blue jeans and she would go wild, leaping in circles, and tackling my sister and I until we made our way out to the car.
My sister, Andrea, would always get either a chocolate eclair or a cream napoleon, my mom always got a Danish (I still don't understand this) and my dad and I would mix up our orders every week. I always gravitated toward the petits fours, with either a mini cheesecake, carrot cake, almond cream puff, or cannoli--the only thing more appealing than mini cakes. My dad seemed to get a different thing each time, though if there were almond croissants, he'd get at least one.
He always got a box of amaretti.


Well, he almost always got a box of amaretti. Each time we'd visit, he would ask the little old lady behind the counter whether the cookies were crisp or chewy, and would only buy them if they were chewy (lucky for us, the pastry chef who preferred chewy usually had the morning shift on Saturday)
These cookies are still my dad's favorite and though he has a new favorite bakery, every time he goes, he still picks up a box of amaretti and I get to relive those great Saturday mornings filled with delicious cookies, almond scented pastry cream, and adorable petits fours with my family.
I decided to leave each member of my family with a little gift of food when I leave for school, and thought these would be perfect for Dad. My mom's getting pretzel rolls, and Andrea's getting meringue cupcakes, but of the 3, these are my favorite, and the most sentimental.

I've tried several recipes and though they always come out tasting great (except the one batch that was crunchy shudders) I have never ben able to perfectly recreate the cookies from the bakery. This batch comes closest as it's pretty dense and has a stronger almond flavor from the almond extract. In all honesty, most people probably wouldn't be able to tell the difference between these and the cookies from my childhood, but I've had plenty of experience with amaretti, and the memory of the flavor of these cookies stands out in my mind because it's surrounded with so many other great memories.

Soft Amaretti Cookies
(Gluten Free)
Makes about 20 cookies

7 oz crumbled almond paste
1/2 cups powdered sugar
1 egg white
1/2 tsp almond extract
1 Tbs honey
Pinch of salt

Preheat oven to 350ºF and line 2 cookie sheets with parchment.
In a stand mixer, beat the almond paste on high speed, until thoroughly broken up, somewhere between crumbs and a spreadable paste. Slowly add the powdered sugar, continuing to stir on low speed.
Add the egg white, extract, honey and salt and beat on medium, until thick and well mixed. This should take about 5 minutes.
Put the dough in a pastry bag with a plain tip and pipe 1 inch circles onto the cookie sheets and bake for 10 to 12 minutes, until crisp on the outside but still soft and slightly gummy on the inside.

Sunday, September 30, 2012

Salted Dulce de Leche Chocolate Tart

I'm not in a relationship. Well, I'm in relationships, I have friends, a sister, parents, all the extended family, and people like that, but I'm not in a relationship with a man/boy/male.
If I was, I'd probably make him fat. So, it's a good thing that my sister's boyfriend if a skinny guy because I've made it my goal to break his addiction to chicken fingers, fast food pizza, and Snickers and turn him on to something called--what's the word again? Oh, yeah, flavor. He doesn't even like brownies. I swear to God, I will change him.
The one food I've ever seen him get emotional over is manjar. He doesn't just like the creamy Chilean dulce de leche, he has a relationship with it, and I guess you can add it to my list of relationships too.
His birthday was last weekend, the same day as my mom's, so I decided to make him a birthday treat. Salted caramel chocolate dulce de leche bars. Oh. Yes. These things are all sorts of dangerous.
My sister brought them on a picnic dinner with all of his other favorite foods and was kind enough to snap a few shots of the bars at home on a picnic blanket and in their mouths.
Happy Birthday Al Pal!

Sorry there are no pictures. I told my sister to take pictures of it when they were on their picnic because I thought the scenery would be great for the pictures. They didn't take pictures, though. They squished it in the picnic basket and then they ate it. Sorry. I promise I'll make it again, and when I do, you'll be the first to see the pictures!

Chocolate Dulce de Leche:
Makes 1 9 inch tart

1 quart 2% milk
1 cup of sugar
2 tsp vanilla extract
1/2 tsp baking soda
1 cup of heavy cream
4 large egg yolks
3 oz chopped bittersweet chocolate
1 tsp sa salt + more for the top

1 stick of butter, melted
2 cups ground digestive biscuits
1/3 cup light brown sugar, packed
1 Tbs sea salt

For the Dulce de Leche:
In a large pot, combine int sugar and milk. Bring to a simmer, stirring regularly, until the sugar it totally dissolved.
Remove from the heat and add your baking soda (if it's lumpy, you can first dissolve it in about 2 Tbs of warm water) and salt. Whisk like crazy to combine, then return the pot to the heat.
Bring the milk back up to a simmer and cook for about an hour, until it is pale brown in color, stirring only occasionally.
Continue cooking, keeping a close eye on the mixture until it deepens in color, has reduced to 1 cup, and is about the thickness of jarred caramel, it will thicken even more when cooled.
Remove from the heat, strain through a fine sieve and cool to room temperature (it's fine if the mixture is still pretty warm)
Bring the cream and newly made dulce de leche to a simmer in a heavy pot, stirring until the dulce de leche is dissolved.
In a bowl, whisk the egg yolks and slowly pour in the dulce de leche, whisking as you pour. Continue whisking until the mixture is very well combined.
Return the mixture to the pan and cook over a gentle flame until the mixture is thickened and the spoon leaves tracks on the bottom of the pot. Remove from the heat and whisk in the chocolate and vanilla extract as if you were making a ganache.
For the Crust:
(Best made when the milk and sugar are still simmering for the dulce de leche)
Preheat the oven to 350ºF. Line the bottom and sides of a 9 inch springform pan with a piece of parchment and grease the parchment.
In a food processor, blitz the digestives, salt, and brown sugar until very fine. Add the melted butter and pulse until the mix becomes thickened and crumby.
Press into the bottom of the pan and just about 1/4 inch up the sides. You want a good 1/2 inch thick crust for this recipe.
Sprinkle the top evenly with about 1-2 tsp sea salt and bake for 15 minutes. Chill until cooled after removing from the oven.
Construction:
Once the crust is cooled, pour the dulce de leche into the crust and spread into an even layer. Chill in the fridge until cold and set (2-3 hours)
To remove from the pan, just pop off the sides and peel away the parchment. Cut into generous slices, and enjoy!

Sunday, September 23, 2012

My Taste of Home: The Perfect Chocolate Chip Cookie

My favorite food is a really good chocolate chip cookie. Really, it's true. It's not because I have memories of making them from scratch with Mom (who NEVER ever bakes) or because my grandma has a great recipe that makes me sentimental. No, I am in love with chocolate chip cookies because they embody everything I love about food.
And, if you were unsure, I love food.
They're a textural adventure, chewy, crunchy, gooey, and crisp all in one bite. They're chocolatey and vanilla-y and caramelly and salty and sweet. They don't have frosting, they shouldn't ever have a glaze, and they just look so adorable and perfect.


I'm leaving for college in the morning, so I just had to make a double batch of these. 1/2 are hiding in the freezer for Mom and Dad to enjoy when both their kids leave in one swoop (I'm a twin) and the other 1/2 has been packed up in my purse. Yep, I have a purse full of cookies and I'm not ashamed.
They're a little taste of home.

I have been on a quest for the absolute best chocolate chip cookie ever. I might post my original recipe someday, but now that I've found this guy, I might not give you any of the others. I don't want you wasting your time on sub-par cookies.

These guys aren't your super quick mix, drop, bake at 350º for 15 minutes cookies. These are made in a large pot, there are 3 different oven temperatures involved, and they have to be baked for exactly 9 minutes. Yep, 9. Not 10, not 8, and if you leave then in for the standard "12 to 15 minutes" I might just cry.
Please, also use chocolate chips. I know that using good quality chopped chocolate is sort of the big thing to do now, but that's a chocolate chunk cookie and that's an entirely different animal. An animal I'm not too big on either, believe it or not. I do recommend a slightly bigger chip here, though. Ghirardelli 60% is perfect because the chocolate is free of waxyness, and the chips are fairly flat, so they melt very well.

The Perfect Chocolate Chip Cookie
Adapted from America's Test Kitchen

1 3/4 cups AP flour
1 tbs cocoa powder
1/2 tsp baking soda
14 Tbs unsalted butter
1/4 cup granulated sugar
1/2 cup dark brown sugar
1 tsp sea salt
1 large egg, 1 egg yolk
2 tsp vanilla extract
1 1/3 cup semisweet chocolate chips (yep, the 1/3 is right on the money for even chip distribution)

1) Preheat the oven to 400ºF and position 1 rack at the middle level and the other at the level 2nd from the top. Line 2 cookie sheets with parchment paper.
2) In a large pot, melt the butter over medium heat. Continue cooking until the butter turns a golden color and starts to smell nutty. Remove from the heat and immediately mix in both sugars. Mix until well combined and the mixture has cooled significantly. This should take about 2 to 4 minutes, and some of the sugar should have melted. If the sugar does not melt, return the pot to medium heat for about 2 to 3 minutes, and then re-cool the mixture. Beat in the vanilla, egg and yolk.
3) Add half of the flour, all of the cocoa powder, baking soda, and salt, stir until almost combined, then add the rest of the flour. Mix well.
4) Fold in the chocolate chips and form into about 20 cookies of 2 tbs dough. Space evenly on the two baking sheets. Put in the 400º oven, on the center rack, and bake for 2 minutes. Lower the oven temperature to 300ºF and bake for an additional 5 minutes. Heat the oven again to 425º and move the cookies to the higher rack for the last 2 minutes of baking. Remove from the oven at 9 minutes exactly.
Cool on the pan for 2-5 minutes before transferring to a cooling rack or your mouth.
Enjoy!

Sunday, September 16, 2012

Nightcap of Choice: Steamed Cinnamon Almond Milk with Honey and Cardamom--ready with pics

I need to drink something hot after dinner. I call it my nightcap.
If I had my way, it would be hot chocolate every night, but because I have to be rational sometimes, and a day full of cookie baking, followed by a large mug of cocoa cannot be called rational, I usually make tea.
I'm sick of tea right now. I sipped it all summer long, and I want something more. Something that screams fall, something spicy, healthy, and a little sweet.
That's where Andrea comes in.

My sis is a die hard almond milk fan and has really turned me onto the stuff. Her favorite preparation: Steamed.
She usually just gives it a good fluff, maybe with a little bit of cinnamon or honey, but I go hard.
Not like that, oh no, I meant with spices.
Legal, healthy spices.


Steamed Honey-Spiced Almond Milk
Serves 2

1 1/2 cups plain, unsweetened almond milk
2-3 cardamom pods, cracked with seeds inside
3 tsp honey
1/2 tsp cinnamon

Preheat the steam setting on a cappuccino machine.
Fill 2 10 oz mugs (8 oz will cork, but it's a tight squeeze) with 3/4 cup of almond milk, each.
Add half the honey, cinnamon, and cracked cardamom pods to each mug.
Stir well. Using the steamer heat the milk until warm, not adding any foam. Stir again, until the honey is dissolved in the mugs.
Return the mugs to the steamer, moving constantly and bobbing up and down until foamy and hot. Serve hot with the cardamom pods still in the mugs for extra aroma and steeping flavor. Do not eat the pods.

*Make sure you clean your steam nozzle thoroughly, as the honey will make it sticky*

Thursday, September 13, 2012

Mom's Quick Corn Salad (ready w/ pics)

There are a few things you need to know about my mom: She's not into cooking. She makes great banana bread. When she finds a recipe she likes, she makes it nonstop.
That third fact is why she is a gnocchi pro, and why I look forward to family barbecues. I love my family and all, don't get me wrong. But I really, really love her corn salad.
I have a weird memory of her getting the original recipe from something Paula Deen made, but because she's very into altering recipes, she made something better.
She always makes it with frozen corn, but because it's summer time and that means that freshly husked corn on the cob is pretty much mandatory, you can feel free to use that instead, just cut the corn off the cob instead of tossing a bag in the microwave. Other types of beans ca be subbed in too, depending on what you like and have on hand. We're a black bean family, but if you're the kidney or pinto sort, I'm sure that would be great too!
Probably would have been a better idea to take pictures before digging in. Oops

Mom's Corn Salad:
Serves an Army

6 cups frozen sweet corn (thawed, or fresh, cut off the cob and blanched for 4 minutes)
2 15oz. cans black beans, rinsed and drained
2 avocados, finely cubed
1 large red onion, chopped fine
2 medium tomatoes, chopped fine
1/4 cup olive oil
3 Tbs red wine vinegar
1/2 tsp lime zest
1 tsp cumin
1/2 tsp chili powder
Salt and Pepper to taste

Thaw your corn and place in a large bowl. If you're using fresh corn, cut it off the cob and blanch it in boiling water for 4 minutes. Transfer to an ice water bath tho stop the cooking and cool the kernels.
Drain your corn and toss with the beans. Gently fold in the onion, tomato, and avocado.
In a small bowl or measuring cup, mix the olive oil, vinegar, chili powder, cumin and lime zest.
Slowly mix the dressing into the salad, until the mixture is coated but not wet. Taste and season with additional cumin, chili, salt and pepper.
Chill the mixture for an hour, or until cold all the way through.
Serve and send the extras home with grandma!

Sunday, September 9, 2012

Vegan, Flourless Chocolate Pumpkin Cookies


It's fall, and I'm excited. I'm super psyched for sweater weather, crunchy leaves, the pretty contrast of orange leaves against a blue sky, and pumpkin. I'm excited for pumpkin.
I go a little crazy in the all, adding pumpkin and cinnamon to just about everything I bake and eat. Pumpkin and spinach curry, pumpkin mousse, pumpkin bread, pumpkin soup. I especially love adding it to chocolate.
The sweet earthy flavors of chocolate and pumpkin are surprisingly similar and go together beautifully, especially with a healthy splash of vanilla and a healthy dash of spice.
These cookies are vegan and flour-less, but that's not a matter of them being trendy, it's a matter of getting the best texture possible. They're like loose fudge and the oats provide just enough texture to keep these guys in the cookie category.
I hope you love them as much as I do, and share them with your vegan friends who have Celiac's (I really hope that's not a thing, it would just be too sad.)

Flourless Pumpkin Chocolate Oatmeal Cookies
Makes 24 cookies

1 15 oz can pumpkin puree
2 cups rolled oats
1/4 cup unsweetened cocoa powder
1 fake egg (mix 2 Tbs baking powder, 2 Tbs water, and 1 Tbs oil of choice)
1 tsp salt
2/3 cup dark brown sugar
1/2 tsp ground cinnamon
1/4 tsp ground ginger


In a bowl, mix the oats, cocoa, spices, baking powder and salt.
Combine the "egg", pumpkin and sugar and mix well, until slightly fluffy.
Add the oat mixture to the pumpkin and mix until thoroughly combined.
Scoop 1 Tbs rounds onto a parchment lined baking sheet and bake at 350ºF

Saturday, September 8, 2012

Because We Can: Ripening Tomatoes

Dad is a doer.
When he works at home, he grocery shops, fixes the bathroom sink, makes 25 gallons of beer, and actually gets all his work done.
On Sundays, he take a nap. His nap is a sort of reward for what he does earlier in the day like...
walking the dog, making a trip to the grocery store, going to Lowe's, watering the plants, dropping off the dry cleaning, making about 400 espressos/coffees/teas for the rest of the family, making at least 5 work calls, driving me or Andrea or the dog somewhere, waking up at 6am, going for a run, and picking up lunch.
This week, we added ripening tomatoes to that list.
Dad likes to do interesting things, and the kitchen or basement brewery are where most of these things take place. The mostly all work out, probably because he bases a lot of his kitchen decisions on Alton Brown's teachings.
We love that man.

We've been growing a lot of tomatoes this summer, and Mother Nature's been growing a lot of chipmonks. Turns out, chipmunks like to devour tomatoes. To protect our miniature home garden, we've been hoarding still-green tomatoes, hoping and praying that they'll ripen up on the kitchen counter.
We haven't been too successful.

This disappointment, of course, led my dad to do some research on how to coax your tomatoes into ripening. After a couple of attempts and remembering that Mr. Brown ripened something with a banana in a bag, we threw some better thought out key words into Google and found the method.
The very best way to ripen tomatoes off the vine.

You will need:
Tomatoes
A ripe banana
A paper bag

You will need to:
Put the banana in the paper bag.
Add the tomatoes, close the bag pretty tightly.
Leave the bag on the counter for four-ish days, checking for ripeness every 2 days or so.

Enjoy your tomatoes!


Sunday, September 2, 2012

Strawberry Swirl Meringue Cupcakes

My sister is a meringue fool.
Marshmallows are her absolute favorite, but a meringue with a soft center will make her crazy.
Meringues are to Andrea what Chocolate Chip Cookies are to me. Yes, Chocolate Chip Cookie is a proper noun here.
It's where they had the snowball fight in Elf!

Before we left for college, I made each member of my family a special treat. Mom's getting soft pretzel rolls, Dad's getting amaretti cookies, and Andrea's getting meringue cupcakes.
They may look like regular cupcakes, but...

These are pretty amazing, and I'm pretty proud of myself. Martha, as in Stewart, has a recipe that's really similar to this, but I didn't see it until after I developed my own. I sort of feel like a pro, but no big deal.


The meringues are still soft on the inside and the base is all vanilla. Andrea's a huge fan of strawberry, so that's the flavor I used, but if you prefer plain vanilla or another fruit, feel free to substitute. The mango from Trade Joe's would probably be great, and I'm dying to make a couple batches of these with apples and cinnamon in the fall.
But these are very special!


Strawberry Swirl Meringue Cupcakes
Makes 12 Cupcakes and tops

6 egg whites, at room temperature
pinch of salt
1 tsp white vinegar
1/2 tsp vanilla extract
1 1/2 cups white sugar
1/2 cup freeze dried strawberries, powdered in a food processor (use your favorite fruit)

Preheat your oven to 225ºF, and line a 12-muffin tray with cupcake liners and spray with nonstick spray.
In a clean bowl, with a hand mixer or stand mixer, beat the egg whites and salt on medium-high, until they are frothy, continue beating and slowly add the vinegar and vanilla.
Beat on high until the mixture forms medium peaks. Add the sugar 1 tablespoon at a time, beating continually, then beat for 2 more minutes more, until the eggs are shiny and form stiff peaks. The sugar should be dissolved.
Transfer the 2/3 of the egg whites to a plain pastry bag or plastic bag with the corner snipped off, and fill the 12 liners just to the top.
In the bowl, gently fold the powdered strawberries into the remaining egg whites, mix until the mixture is marbled with pink--swirled, not solid.
Transfer the strawberry meringue mixture to a clean pastry bag and pipe 2-inch swirls onto the tops of the cupcakes, coming about 1 inch above the top of the liner, at the highest point. The swirls should be the same diameter as the top of your cupcakes.
Put the cupcake pan in the oven on the center rack and bake for about 3 hours, until the outside is dry and brittle, but the middle is still soft. Turn the pan half way through.
Enjoy!

*You can find freeze dried fruit at Target (Archer Farms brand) and Trader Joe's*

Monday, August 20, 2012

The Nervous Bakes

Some people get the nervous shakes. 
Or the nervous giggles.
I get the nervous bakes.
This leads me to do regrettable things, like attempt a batch of yeasted, flourless, sugarless, banana-oat bread at 1:30am.
Than a new recipe for chocolate peanut butter cookies at 2am. When I'm on a diet. 

I didn't realize I was nervous until I emptied the too-large jar of yeast, busted out the peanut butter and began mixing even though there were dirty dishes still in the sink.
I didn't realize I was nervous until I started planning a cookie spree instead of tomorrow's workout (I stopped that one dead in its tracks)
I didn't realize I was nervous until I started using Punchfork like a stress ball, scrolling farther and farther down the page with every squeeze of my heart, each clench of my stomach.
I didn't realize I was nervous until 20 different people asked me if I was nervous. I told them 
No.
I'm fine.
Excited.
Just fine.

Then I went a little nuts.
In the kitchen-with the rubber spatula and metal bowl I will have to leave behind.
With the oven knob and the tablespoon measure.
With the plastic wrap and tiny tasting spoon.

But now I know. I know I'm nervous. 
I know I screwed up. I know that tomorrow I will finally pack.
And finish that survey. And find my passport.

Oh, and I have some cupcakes to make, too.

Sunday, August 19, 2012

Hug in a Mug Brownie Pudding (single serving)

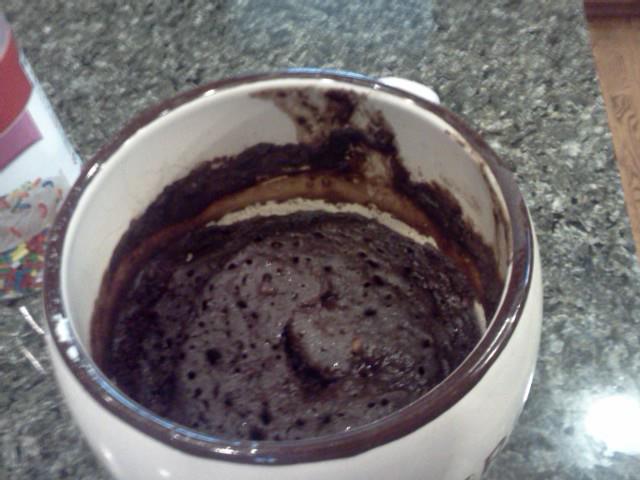
A single girl molten chocolate pudding cake for when you need a chocolate hug.
I'm going to keep this post short because I know you don't need an anecdote, or bossy directions. 
Good.
You need help.
You need a hug.
You need chocolate.
You need all this things now.
Here it is, a Hug in a Mug:
Better with Warm PB Sauce

Hug in a Mug:
Serves 1

5 Tbs unsalted butter, melted
1 large egg
1/4 cup of sugar
2 Tbs cocoa powder
1 1/3 Tbs all purpose flour
2 Tbs unsalted butter
2 Tbs heavy cream
1/4 cup sugar
1/2 tsp vanilla extract
1 1/2 tsp sea salt


Because some colorful sprinkles will make you smile
Preheat oven to 325ºF and grease 1 ramekin or oven safe mug.
Beat the egg and 1/4 cup sugar until very thick and pale yellow in color (5-10 minutes)
In a pan, bring 1/4 cup sugar and 2 Tbs water to a boil. Cook, not stirring until dark caramel in color. Remove from the heat and add 2 tbs butter and heavy cream, whisking well to incorporate. Add the vanilla extract and salt and reserve 1-2 tbs caramel.
Whisk together the flour and cocoa powder until there are absolutely no lumps. Slowly add the butter and flour mixture to the eggs, folding together with a rubber spatula, fold in the caramel still in the pan.
Pour into a greased ramekin and bake  for about 20 minutes (the top should be cracked but the inside should be fairly liquid)
Cool for 5-10 minutes before eating, while still very hot, topped with the reserved caramel.

Thursday, August 16, 2012

Whole Wheat Pita Bread

I know, it's strange how much bread I've been baking in August.
Bread is my de-stresser, my therapy, my physical outlet (I firmly believe of the throwing of dough on the counter)

I made 2 different types of bread this morning-to-afternoon.
Whole wheat pita, and cranberry walnut bread, both are to be gifted away.
There's something very grandmotherly about giving somebody a loaf (or stack) of bread for a gift. Unlike brownies or cookies, nobody can assume it was made from a mix or prepackaged dough, it has a certain heft that makes me feel like it actually counts as a gift.

Now that I'm finished singing the praises of loaves of bread, let's sing about flatbread, specifically the pita.
Boy, oh, boy, the pita! Firm, bubbled, pocketed vessel of hummus.
Baked into chips, used to clean out the bowl of spicy soups, simple to make, and so fun to shape from little balls into rounds.

These hold flavors beautifully, garlic, herbs, even a little parmesan cheese can be added to the top or middle of the rounds for a more flavorful bread, but that'll be another post. For now, we'll focus on plain pita, hummus' favorite friend.

Whole Wheat Pita
Makes 16 (2 oz) pitas

3 1/2 cups white whole wheat flour
3/4 cup warm water (105-110ºF)
1 tbs dry active yeast
2 tsp sugar
2 tsp salt
2 tbs olive oil, divided

In a small bowl or measuring cup, mix the water, sugar, and yeast. Let the mixture proof for 5 minutes, or until foamy. If the mixture does not foam, repeat this step with new yeast.
In a large bowl, mix the flour and salt. Add the yeast mixture and 1 Tbs of olive oil to the flour.
Mix with a fork until thoroughly combines (about 3 minutes)
Turn the dough out onto a floured surface and continue kneading for about 6 more minutes, until the dough is smooth and elastic.
Form the dough into a ball and coat with the remaining oil. Place back in the mixing bowl, and allow to sit, covered with a warm kitchen towel, for about an hour and a half, or until doubled in size.

Once risen, preheat the oven to 500ºF and turn the dough out onto a clean work surface.
Divide the dough into quarters, careful not to press the air out of the dough.
Flatten each quarter into a square, about 1 inch thick, and cut the square into quarters.
Roll the 16 pieces of dough into balls. Cover the balls with a kitchen towel and allow to rise again until slightly risen, about 20 minutes.
After the second rising, roll the dough into 6 inch rounds on a floured surface and place on a heated pizza stone or bottom of an overturned baking sheet.
Cook the pitas for about 2 minutes, or until puffed.
Eat with hummus, bake into chips, use to soak up soup; enjoy them in whatever way you please!