Thursday, May 31, 2012

Quick Dark Chocolate Marzipan


Sometimes, you need to make something really quick, but you still need it to be really good and special. This is where marzipan comes in. I have shared a recipe for a long form marzipan before, but I'm currently in the process of stocking up on hand made food gifts for the seemingly endless number of graduation parties I have this summer, so I don't have the time or patience to be grinding almonds and cooking egg whites to perfection.

This is not a very sweet marzipan, and it leans on the side of stickiness, but that's how I like mine, all almond flavor with a sharp contrast between the texture of the chocolate filling and the marzipan casing.

You can make these with any type of chocolate filling, but I like a dark chocolate with a fairly low percentage of cocoa solids. I generally go with about 60% cocoa. This may seem a little strange, but it's meant to balance out the pure nuttiness of the marzipan. Think of it this way, if you need a bitter chocolate, your marzipan is too sweet.
(I know, I need to get some more plates for photos)


Quick Marzipan with Dark Chocolate
Makes 30 filed marzipan cups

8 oz Almond paste (not marzipan)
1 Tbs light corn syrup
1/2 tsp almond extract
3.5 oz dark chocolate

In break the almond paste into peces a bowl. With a hand mixer, beat the almond paste until smooth. Add the corn syrup and and almond extract continue beating until it forms a smooth dough. If the mix is too dry, add a teaspoon of corn syrup. You want a slightly sticky dough, so if the dough is too wet, add a couple tablespoons of powdered sugar.
Form into small balls and make a dip in the center of each with your finger tip, to make a small bowl shape.
Melt and temper the chocolate. Use a small spoon or squeeze bottle to fill the marzipan bowls to the top with chocolate. Chill in the refrigerator until the chocolate is completely set and the marzipan is dry, about 2 to three hours or over night. Package, share, enjoy!

Strawberry Balsamic Popsicles

I remember the very first time I had strawberries and balsamic vinegar. I was probably eight years old and my dad had read about the new crazy combination in Bon Appetit magazine. While I have always been a lover of balsamic vinegar (The reduced stuff is by far the best ice cream topping in the world--yes, even better than fudge or caramel or both) the mix of berries, vinegar and pepper was not very attractive to my eight year old self.

But then I tried it. Oh my goodness was it amazing! My dad added some sugar and let the berries soak up the vinegar for about an hour before we dug in to the bowl of ruby colored berries.
This is still one of my favorite combinations, and even though I absolutely hate black pepper, it is very very necessary in this recipe. It perfectly balances the sharpness of the vinegar and berries. Oh, and if you can, use the ripest strawberries you can find, they balance the sweet and savory combination without the addition of too much sugar, so you get more of the pure berry and vinegar flavor.

Strawberry Balsamic Pops

1 1/2 cups ripe strawberries, hulled and stemmed
2-4 Tbs sugar
1/2 Tbs Fresh ground black pepper (finer is better)
2 1/2 Tbs good balsamic vinegar

In a blender or bowl with a hand mixer, blend the strawberries and sugar until it forms a chunky liquid (hard to explain, but the picture above is more descriptive). Add the pepper and vinegar and mix well. Portion into your popsicle molds and freeze until solid, 6 hours or overnight.

Wednesday, May 30, 2012

Lemony Quinoa Cakes

Where there's quinoa, there are creative thoughts. If the quinoa's in my kitchen, anyway. This stuff brings out the best in me, and I have no idea why. It's found it's way into many muffins, porridges, curries, stews, pancakes, and patties like these lemony quinoa cakes.

While I's like to say that these are an act of creative genius, I'll admit that I had something a little more impressive in mind, but was met with a very empty fridge, and not one leaf of the arugula I so desperately wish made it's way into this recipe. They were amazing when I finished, don't get me wrong, just not what I was planning on making when I woke up this morning.
The secret ingredient...

Ok, now I'm making it seem like these guys aren't absolutely great. They are absolutely great, and creative, just not what I had initially planned. They're especially amazing topped with a thin slice of pepper jack cheese. Yum.

Lemony Quinoa Cakes
Makes 6 4" round cakes

1 cup uncooked quinoa
2 cups of water
salt

Zest of 1/2 lemon
1 Tbs raisins, minced
1 1/2 Tbs chopped chives
1 large clove of garlic, minced
1/2 orange (or yellow, or red) bell pepper, chopped
1/4 cup ricotta (I used part-skim)
2 eggs
1/4 c fresh bread crumbs (2 pieces of normal bread, torn or processed into small crumbs)
1/

Combine rinsed quinoa, water and salt in a medium saucepan. Bring quinoa to a boil, then simmer, covered for about 10-15 minutes, or until the quinoa has fully absorbed the water. Remove the quinoa from the heat and cool while preparing the rest of the dish.

In a bowl, combine the eggs, ricotta, lemon zest and raisins (the raisins should be so fine that they almost form a paste) Whisk thoroughly so that the raisin is even spread through the mixture. Add the rest of your ingredients, and mix well. Fold in the quinoa and season with salt and pepper to taste. Cove the mixture and chill for 10 minutes, or until cold all the way through.

Heat  olive oil in a medium skillet and form 6 cakes with your chilled mixture. Cook 2 or 3 cakes at a time, flipping when golden and crispy (about 2-4 minutes per side over reasonably high heat). Top each cake with a slice of pepper jack, fresh chopped tomatoes, or your favorite topping. Enjoy!
Buddy's favorite food: Orange bell peppers


Chai Coconut Milk Popsicles

Today beings the week of popsicles. I have a thing for week long challenges and even more of a thing for frozen deliciousness on a stick. I'm pretty darned excited, if you couldn't already tell.

This is probably the simplest of all the recipes. It's literally just brewing tea, as long as you use a good quality tea. If you've only got low quality tea lying around, add a cinnamon stick and a couple cardamom pods to the tea when it's on the stove to boil. This will perk it up a little so it tastes more like a rich tea pop and not just frozen sugar water.

What makes this even better is that on day 8, there's a special surprise for you. But we'll leave that for day 8, because it's a surprise!

Chai Coconut Popsicles

2 cups water
4 chai tea bags
1 cup coconut milk (I used Lite)
3 Tbs honey

Put the tea bags in a pot of kettle and cover with the water. Bring the tea to a boil and then remve from the heat. Cover and let steep for 3 to 5 minutes more. Mix in the honey and coconut milk and cool the mixture to room temperature. Divide the mix between your popsicle molds or cups and freeze.
If you're using paper cups or silicon baking cups, freeze for 1 hour before inserting a stick in the middle, then continue freezing until solid (about 6 hours) If you're using molds, the sticks are usually attached already, but if they're not, just follow the cup method.
Unmold, pop out, or tear away the paper and ENJOY!

Saturday, May 26, 2012

Fresh Pea Pesto and Ditalini

People don't eat enough ditalini. I think people think of it as a sort of kid's pasta, and it really is entertaining, but everybody deserves some dinnertime entertainment, not just little kids. Sticking with the theme of little kid pasta, there's the pea.  I'm pretty sure every kid in America had a childhood filled with buttered noodles with peas mixed in. Except, it's hard to mix a pea with pasta, so it ended up being a plate of buttered noodles with a bunch of peas sitting on the bottom. While this dish was in no way my inspiration for pursuing fine food, it did inspire on fine pasta dish.

Pesto is probably the most versatile sauce/dressing/spread/dip in the entire world. You can make it with any number of herbs, veggies, oils and seasonings. Fresh pea pesto has to be one of my all time favorites though. It's bright green color, nutty undertones, and occasional bursts of garlic against the sweetness of the pas really makes this stand out. And, this entire dish was ready in less time than it takes to unload the dishwasher and set the table!

Ditalini with Fresh Pea Pesto
Serves 4

6 oz ditalini pasta
2 cups fresh peas (you can use thawed frozen, just don't blanch them)
1/3 cup whole almonds, toasted in a dry pan for 5 minuted over medium heat
1/3 cup extra virgin olive oil
2 cloves of garlic, crushed
1/4 cup fresh Thai basil
Salt and Pepper to taste
1/4 cup Reggiano Parmigiano


Bring a 4 quart pot of salted water to a boil. Quickly blanch peas in the water for 2 minutes, remove, and shock in an ice water bath. When the water is boiled, add pasta to water and stir occasionally, cooking for 8 to 10 minutes. Remove 1 cup of pasta water from the pot before draining pasta.
While the pasta is boiling, heat the olive oil and garlic over medium-low heat, to infuse the oil with the garlic. After infusing the oil for 10 to fifteen minutes, remove from the heat.
Put the almonds, basil, peas, garlic and oil in a blender and blend until almost smooth. Add pasta water as needed to thin to desired consistency.
When the pesto is smooth, mix in the cheese, salt and pepper to taste.
Pour over the drained pasta and serve.
Even Buddy Likes It!
He actually loved it, and licked the empty bowl clean:)

Friday, May 25, 2012

Make Boxed Cake Mix Better and Buttercream

It's Memorial Day weekend and even though I posted a cake recipe yesterday, I realize that for most people a 2 day cake isn't really family barbecue material. So here's my super fast recipe for a great cake mix cake and 3 different frostings!
There aren't any pictures because this is more of a guide than a recipe, but I'm sure you'll see pictures of similar recipes soon, especially the frostings.

Making Cake Mix Great:
Pour your cake mix into a bowl.
In a different bowl, mix the eggs called for on the box with 1 extra egg yolk.
Replace the water called for on the box with milk, and add to eggs. Mix to combine.
Add the oil called for on the box (or use melted butter), 1 tsp vanilla extract, and 1 tsp instant espresso for chocolate cake
For an extra rich cake, mix in 1/4 cup yogurt or sour cream.
Mix wet ingredients well.
Add the wet mix to the dry mixture, mix well and bake  according to the directions on the box.

Mixing the wet ingredients  before adding them to the dry will give you a finer crumb.
Feel free to mix and match the above steps and do what's convenient for you! This recipe gives you a super moist cake.

Favorite Cake Mixes:
Yellow: Betty Crocker Super Moist Yellow cake mix tastes almost exactly like the King Arthur version, but is 1/2 the price!
Chocolate:Duncan Hines Devils Food Cake
White: Betty Crocker Super Moist Cake mix in Vanilla

Frosting: Feel free to dye them patriotic colors
Classic Vanilla Buttercream:
3 cups of powdered sugar
1 cup softened butter cut into large pieces
1 1/2 tsp vanilla extract
2-4 Tbs whipping cream
With a hand mixer, beat the butter and sugar on low, moving up to medium, until they are combined and slightly sandy in texture. Add vanilla, dye, and 2 Tbs cream. Continue beating, moving up to high speed. If the mixture needs thinning, add more cream very gradually. Whip until fluffy

Chocolate Buttercream:
1 pound powdered sugar
1 cup good quality bittersweet chocolate, chopped
1/2 cup softened butter
2-3 Tbs whipping cream
pinch of salt
1 tsp vanilla
1 tsp instant espresso
Melt chocolate gently in a double boiler or the microwave. Set aside to cool for 5 minutes. Dissolve espresso in 2Tbs cream, and add vanilla. Beat the butter, sugar and salt together until well combined, about 3 minutes. Add cream mixture and beat to combine. Slowly add chocolate, raising mixer speed to high, until the frosting reached medium peaks. If the mixture is too warm, cool in the refrigerator after the chocolate is completely incorporated. Whisk again to fluff it up before using.

Summery Mint Buttercream:

3 cups of powdered sugar
1 cup softened butter cut into large pieces
1 tsp mint extract
2-4 Tbs whipping cream
3 Tbs chopped fresh mint leaves
With a hand mixer, beat the butter and sugar on low, moving up to medium, until well combines-- 3 minutes. Add mint extract and 2 Tbs cream. Continue beating, moving up to high speed. If the mixture needs thinning, add more cream very gradually. Beat until desired consistency, then gently fold in chopped mint leaves with a rubber spatula.


Way Better than a Milky Way Homemade Chocolate Truffels

I discovered the Milky Way bar when I was 13 and my boyfriend got me a box of mini chocolate bars for Valentines day. Even though we went out for a grand total of 3 weeks, that boy changed my life. Whether you're a chocolate snob, a lover of anything sweet, or call them by their original name: Mars Bars (ooooh, I just love saying that and I have no idea why) you have to admit that the combination of chocolate, nougat, and caramel is pretty freaking amazing. And if you're like me, you have to admit that you really really just need to experiment with them.

After several attempts at cupcakes, a now semi-famous recipe for brownies, cookies, and an absolutely heavenly recipe for rice krispie treats, using these magic chocolate bars, I decided it was high time I made them myseld, and boy oh boy, am I glad I did. These are not your average chocolate bar. These are rich and salty and malty and bitter. They're buttery and extra chocolatey, and toffee-ish, and amazing. Make them. Please.
                                

I made mine in an ice tray because I spent my baking and cooking budget for the month on chocolate, a giant offset spatula, and a new springform pan. If you want a more traditional looking bar, you can use a chocolate bar mold, or make even smaller bars in a truffle mold but mine broke last time I made truffles, just about a month ago. I know, I have really really good luck in the candy making department.

You do have to temper the chocolate, which can be a challenge, but there really is an easier way than the marble slab method that leaves non-professionals like me with a giant brown mess. You can find easy directions and very detailed instructions and explanations here. Even I was able to follow these directions and end up with shiny chocolate, and I seem to have an inexplicable ability to fudge even the easiest process just because it's labeled as important.

Better than my Favorite Chocolate Bar

Chocolate Caramel
1/4 cup of unsalted butter
1/2 cup of sugar
1/4 cup firmly packed dark brown sugar
1/2 cup milk (any type)
1/2 cup heavy cream
1/4 cup light corn syrup
6 oz chopped semisweet or bittersweet chocolate
1 tsp vanilla extract
1 tsp fleur de sel

Malt Nougat
You're going to have some extra, but I can't seem to get the recipe reduced to 
just the right amount. The leftovers are really good frozen in little squares.
2 cups sugar
1/2 cup light corn syrup
1/2 cup water
2 egg whites
pinch salt
1 tsp vanilla extract
3 Tbs malted milk powder

(Optional toasted almonds for a riff on a Snickers)

For the Caramel:
Combine all ingredients but the salt, chocolate and vanilla in a heavy sauce pan. Cook over medium heat, stirring only every once in a while, until it comes to a boil. Continue cooking until it reaches 240ºF, just under soft ball stage. Remove from the heat and cool to about 200ºF, stir in chocolate and whisk until completely melted. Add vanilla. Pour into a piping bag and wait until the caramel has reached about 80º before piping a layer of caramel over the molded chocolate. top the caramel with a small pinch of fleur de sel. Cool completely before topping with the nougat.

For the Nougat:
Combine sugar, corn syrup, and water in saucepan. Boil the sugar combination, until it reaches 260ºF, without stirring. While syrup is cooking, beat egg whites to form stiff peaks. Add salt and the hot syrup, beating constantly, pouring slowly at first, and speeding up as the eggs temper and get used to the heat. When mixture is stiff, beat with a wooden spoon until creamy. Add the malt and vanilla (almonds), and return to the mixer until the nougat has an almost mousse like texture. When the nougat is still warm (about 70º) pop it into a piping bag and top the salted caramel. Cool completely before finishing it off with the last thin layer of tempered chocolate.


Temper about 1/2 lb of bittersweet chocolate and brush a layer across the bottom and sides of your molds. Cool inverted to allow some dripping.
When cooled, add caramel a little less than 1/2 way up the molds using a piping bag, squeeze bottle or very small spoon(caramel should be about 80ºF) Cool to about 50º.
Fill almost all the way to the top with warm nougat (80º) leaving room for a final layer of chocolate.
After cooling the nougat to about 50º, fill molds to the top with more tempered chocolate and refrigerate for at least 3 hours, until completely set. Unmold and enjoy! 

FlufferNutter Cookies

My parents make me a grand total of 2 FlufferNutter sandwiches when I was a kid. Both of these 2 sandwiches were for my birthday, and both of them were absolutely amazing. I did not grow up surrounded by sweets, by any stretch of the imagination, which is probably why I am so crazy about them now. Because neither of my parents were really fans of the sweet stuff, both of these sandwiches were adulterated with slices of banana. I'm sure that this was my parent's attempt to make the sandwich resemble an actual meal instead of a dessert, and instill in me a habit of healthy eating, but it sort of had the opposite effect. Instead, it instilled in me a deep love of the combination of peanut butter, marshmallows, and bananas. They have been combined with graham crackers and chocolate in many s'mores, and even found their way into a cookie. A really really good cookie, by the way.

These cookies are made with browned butter and whole wheat pastry flour to really bring out the toffee flavor, and impart a warm flavor that tastes a little like graham crackers. You could totally add a healthy helping of dark chocolate to the mix, something I seriously wish I'd done. Instead, I used chocolate marshmallows, because they were the only ones I had on hand. I found out the hard way that they taste no different from the regular white kind, so I don't recommend spending the extra couple bucks for the brown sort.
The marshmallows will also melt out of the cookies and caramelize on the pan, so make sure you use parchment or a Silpat, and DO NOT overcook these guys, because the caramel surrounding the cookies is one of the best parts.
Mmmmm... Gooey caramelized marshmallow
FlufferNutter Cookies
Makes about 30 cookies

2 cups whole wheat pastry flour
1 1/2 tsp baking powder
1/4 tsp salt
1 stick of butter
1/2 cup creamy peanut butter
1 cup gently packed light brown sugar
1 egg, 1 egg yolk
2 tsp vanilla
2 very ripe bananas, mashed
1 1/2 cups mini marshmallows
1/2 tsp flaked sea salt

Preheat oven to 350ºF, line 2 large (3 normal sized) baking sheets with parchment paper.
Brown the butter by heating, with salt, over medium-low heat until golden flecks start to sink on the bottom. Remove from heat, cool slightly, and add the peanut butter, mix until smooth, and cool completely.
In a medium bowl, cream together the eggs and sugar. Mix in the vanilla and mashed bananas. The mixture will be not quite smooth.
Whisk in cooled butter mixture. Add flour, baking powder, and salt. When the wet and dry ingredients are well combined, gently fold in the marshmallows.
Try adding them in 4 batches. Marshmallows seem to have a weird magnet effect and don't want to spread out from each other if you add them all at once.
Scoop the dough into 1" balls, tucking in any marshmallow pieces that seem to be coming out of the ball, to make sure they don't spread around the pan too much, press down to flatten slightly. Bake on the middle racks for 9-11 minutes, until golden, but still soft. They will start to smell like the marshmallows that kids used to burn at camp after they're cooked about half way. Don't freak out, they're not burning, they're just oozing caramel. But this also means that you'll have to be super careful about the timing. Remember, when in doubt, take them out. Underdone is always, always, always better than overdone.
Just thought I'd throw in another picture, as if you weren't tempted enough already


An Italian Dessert For Spanish Final

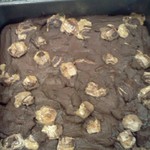
My Spanish final was to cook something. Well, the whole assignment was to make a dish that meant something to you, make a photo presentation, translate the recipe into Spanish, and talk about the recipe is made and why it is important to you. I made a list that was almost a whole page long with possible ideas. Most of the recipes I make, including the brownies I made earlier this week, have a great memory or important person attached to them.

After a couple days of reviewing my list, I realized what waswrong with my list and why the decision was so hard. I hadn't written down the obvious first choice: Cannoli cake!
Every family birthday party is centered around two things. Yep, the cake is just as important as the birthday boy or girl.
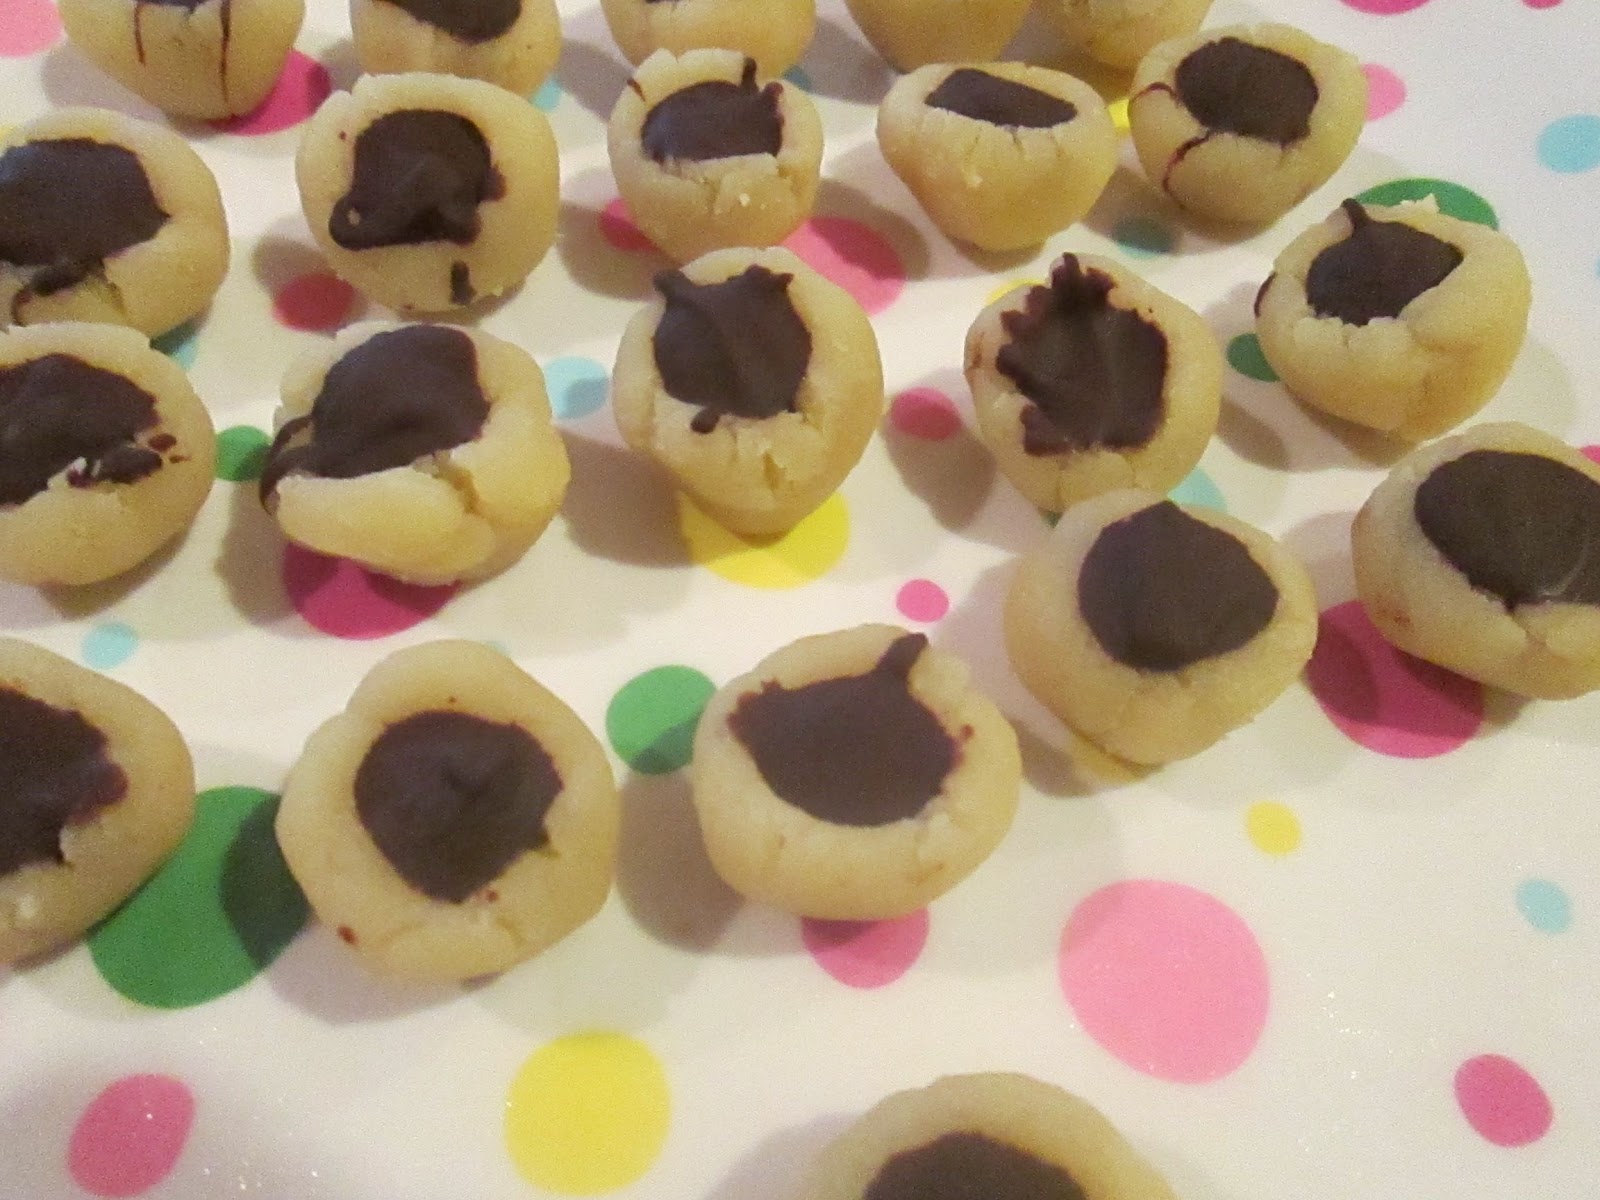
Crackly Circles of Spongy Goodness 

Cannoli cakes, and cannoli in general, make me think of my dad and twin sister. I never see either of them eating cakes or really any other desserts (other than ice cream. My dad's ice cream crazed) but as soon as a cannoli enters the picture, they're fighting over the last cheesy, almond scented crumb. Slices of cannoli cake go missing from the fridge night after night during birthday week, and we never manage to leave a cousin, aunt, or uncle's party without a hefty slice of ricotta filled cake. Cannoli cake makes me happy because it reminds me of when the whole group of us is happy. And they taste pretty darned fantastic.

The cakes at these parties, though, are from our favorite bakery here in Chicago, Ferrara Bakery. So, I was going to have to combine some of my go to recipes for this cake. I had a standby recipe for whipped  cannoli filling, and sponge cake. All was well. Then there was the matter of making the cake portable and easy to serve to 25 people with just a few napkins and a plastic butter knife. Mini cakes, or if we're still going with the fancy names: Petits Fours. They're the answer to almost every cake serving problem becausethey can be eaten with fingers and are precut into adorable mini cakes. For some added interest, I added a layer of pistachio cake to the center and topped it with marzipan, because, really, what's a cannoli without some nuts?
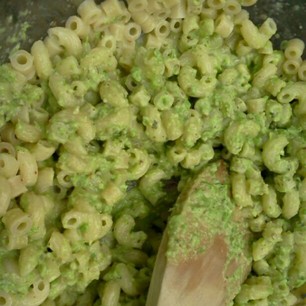
Slightly Chunky Pistachio Batter

When you cut out the little mini cakes from the sponge, you're going to end up with a lot of delicious scraps that should be saved. Even if you're not the "waste not want not" type, you absolutely must save these scraps. I added them to cups of coffee and topped it with vanilla yogurt mixed with a tiny splash of almond extract, and a dash of cinnamon and cocoa. The mix of the cake and coffee brings out a surprising combination of flavors that I had no idea were hiding on the cake. It was like magic. We feasted on 30 second tiramisu. Or, if you want to mak it sound more impressive tiramisu crudo. I find that if you give things fancy names, people think they're very fancy and that your slaved over them for hours.

I'm not sure how well I was able to translate this fairly long recipe into Spanish, and Petit Quatros de Cannoli doesn't sound quite as chic as the Italian name, Tortine de Cannoli, but they taste amazing, the perfect balance between sweet, savory, nutty, and fruity, travel well, and taste like little mini family birthday celebrations. They give a whole new meaning to, "It's like a party in your mouth."


Mini Cannoli Cake "Petit Fours"
Makes 1 sheet cake of each flavor (number of servings depends on size of petit fours)


Sponge Cake:
1 cup unbleached cake flour
5 extra large eggs, separated and at room temperature
1 cup sugar
1 tsp vanilla extract
Pinch of salt.

Pistachio Cake:
4 extra large eggs
1/2 tsp almond extract
1 1/4 cups sugar
1/2 cup roasted unsalted pistachios
2 tsp baking powder
2 cups cake flour
8 oz butter, melted
1/2 c milk (almond milk will also work)
Pinch of salt

Marzipan:
3 cups slivered skinned almonds
1 2/3 cups sugar
Squeeze of lemon juice (about 1 Tbs)
2/3 cup water
1/4 tsp almond extract
Pinch of salt
Food coloring of choice (Optional)

Cannoli Cream:
3 cups Ricotta cheese (Drained for at least 24 hours)
1 cup mascarpone cheese
1/4 c granulated sugar
1 tsp almond extract
1/2 cup chopped pistachios
Zest of 1 Meyer lemon or 1/2 a lime
1 cup dried fruit or mini chocolate chips (I like using freeze dried oranges from Trader Joe's)


For the Sponge:
Preheat oven to 350ºF. With an electric mixer, beat the egg yolks and 1/2 cup of sugar until they are pale yellow and form medium peaks when the whisk is removed. In another bowl, beat the egg whites, salt and other 1/2 of sugar until they form stiff peaks. Add the vanilla and fold the egg white mixture into the yolks. Sift the flour into the eggs and fold in gently. Pour into a prepared sheet pan and bake for about 30-35 minutes, until golden. Cool for at least 10 minutes before cutting into small circles.

For the Pistachio Cake:
Preheat oven to 350ºF. Combine pistachios and sugar in a food processor and pulse until they form a medium grained powder. In a bowl, combine the flour, pistachio mixture, salt, and baking powder. In a different bowl, whisk together the butter, milk, eggs, and almond extract. Gradually add the dry ingredients into the egg mixture, combining thoroughly. Pour the mixture into a prepared sheet pan and bake for about 30-35 minutes, until done. Cool for about 10 minuted before cutting into rounds with a small cookie cutter or other round.

For the Marzipan:
In a spice grinder or food processor, grind the almonds into a fine powder. It is easier to get a finer powder if you work in small batches, about 1/2 cup at a time. Meanwhile, bring the water to a boil and add the sugar. Cook until the sugar dissolves. Add the almond powder, salt, and lemon juice. Continue cooking until the mixture forms a paste that stays together when a little bit is rolled into a ball. Remove from the heat and add the almond extract and any desired food coloring, making sure to mix both in thoroughly. The final stirring is a little challenging because of the thickness of the marzipan, but if you really beat it with a wooden spoon, everything should combine. Dust your work surface with powdered sugar and roll the marzipan out to about 1/4" thick. Use a small round cutter to punch out circles that are the same size as your cakes or a little smaller. Set the marzipan circles aside.

For the Cream:
In a food processor, pulse the cheeses and sugar until smooth. Add the lemon zest and pulse until it reaches the texture of cream cheese frosting (10 quick pulses should do the trick). Move to a bowl and fold in fruit, almond extract and pistachios. Refrigerate for at least 1 hour or until ready to use. When removed from the fridge, the mixture should have thickened up quite a bit.
*To Drain Ricotta: Set a fine mesh strainer over a medium bowl so that it does NOT rest on the bottom of the bowl. Line the inside of the strainer with cheesecloth or paper coffee filters. Pour your cheese into the strainer, top with more cheesecloth, strainers or paper lunch bags. Top again with a heavy plate or bowl and refrigerate for 1 to 2 days. I like 2 days of straining because processing the cheese later brings out any retained moisture and the drier filling holds up much better with the cake.*

To Construct:
1) Cut the cake circles in half so you have 2 thin circles instead of 1 thick circle.
2) Top 2 pieces of sponge with a small dollop of cannoli cream (I used about 1 tsp but it depends on the size of your cakes)
3) Sandwich a pistachio cake half between the 2 creamed sponge halves.
4) Top the 3 layer mini cake with a marzipan round.
5) Alternate sandwiching pistachio between sponge and sponge between pistachio slices.
6) If you are going to be traveling with the cakes, it helps to put a toothpick through the top, deli style, so the layers do not come apart.

You can also make 1 big cake with this recipe if you bake the cakes in 9" round cake pans, roll the marzipan out to 1 large round, and frost the whole thing with whipped cream frosting. You will have to halve one of the cake recipes, though in order to get a 3 layer cake. If you want a 4 layer cake, just add a little more cheese to the cream recipe to make sure you have enough to fill the whole cake.


Friday, May 18, 2012

For Breakfast, Brunch, Lunch, and Dinner

People have a lot of grain prejudices. They only eat whole grains, they only eat grains they're not sure how to pronounce, they don't eat grains at all. They also have strong feelings about the times when each grain is appropriate. Rice is only good at night, oats are only safe to eat in the morning, barley is only eaten in the winter and fall, but quinoa can be eaten whenever you want. Let's all take a cue from quinoa and eat these other grains whenever we darn well please.
I love oatmeal. Oatmeal with berries, nuts, agave, honey, brown sugar, cinnamon, molasses, ginger, peaches, cream, or all by itself. I also like it with tomatoes and hummus. Yep, savory oatmeal is absolutely amazing. I'm eating this one for breakfast, but the timing rant is still relevant because I have made this for breakfast, lunch, and dinner, and if you make a really large batch, I'm sure this would be a huge hit at a brunch.
Sorry for the quality. All the pretty portions were snatched up first.

Grains are the best because you can add anything you like to them, and they almost always come out the other end tasting great. It's also super fun to play around with ingredients that can be sweet, savory, salty, sour, or spicy (explains my love for fruits and veggies too) So feel free to experiment with other savory ingredients and even different grains. I promise, you'll have a lot more successful batches than failures!

Mediterranean Oatmeal
Serves 4

2 cups rolled oats (Not instant)
2 Tbs Hummus
1 clove of garlic, minced
6-ish basil leaves, chopped
1 Tbs olive oil
3 cups of water
1 large heirloom tomato (2 cups chopped tomato)
Salt, Pepper, Parmesan to taste

Preheat oven to 350ºF, and grease 4 ramekins with some of the oil. In a skillet, heat the remaining oil and add the garlic and oats. Toast, stirring often, until the garlic is fragrant and the oats are just golden, remove from the heat. Grease add the salt, pepper, hummus, and basil to the oats when they're still warm and stir to combine. Add the water and stir. Portion the oats into the ramekins, top with the tomatoes and bake for 3 minutes. Add parmesan, if you want, and bake for 3 minutes more. Remove from the oven and allow to cool for a minute or two before serving, because he ramekins will be hot.

Thursday, May 10, 2012

1 Bowl, Chewy, Caramel-ey, Nougat-ey Brownies

Brownies are probably one of the best desserts in the world. Everybody loves them, they welcome a whole plethora of add-ins, and you can stir them up with just a wooden spoon and a good helping of chocolate. I'm somewhat famous for what my friends call Milky Way brownies (My very long title provides a more appealing home made feeling, I think.) and they're the very first recipe I developed all by myself. I actually developed them as a gift for my little sister on my grade school's cross country team. Nothink like a big brick of chocolate and caramel before a run, eh? Of course, they hav been modified just a little bit since then but only on the most basic level: The quality of the melted chocolate has improved quite a bit. The old semi-sweet chips have been replaced by a decent quality dark chocolate--you don't have to use your best stuff, because there are so many other flavors going on, but I recommend at least 60%--I use 72% Valrhona dark chocolate.
Melted Butter and Chocolate. Need I say more?

They're the perfect brownie base, chewy, fudgy, and not very sweet, swirled with big chunks of Milky Way bars, and topped with salted dulce de leche (I created this recipe when I was 13. What 13 year old wants to bother with making caramel from scratch?) They're a very sentimental dessert.
Isn't this the cutest measuring spoon ever? It's a heart, and I got it as a wedding favor. So creative!

That's why I'm making them today. I went on a brownie bender for the better part of last year, and several of my friends became dangerously addicted to various combinations of chocolate, flour, butter, and sugar. This recipe, though, was always the favorite. Now, I only have a week left with these friends before we all graduate, and I realized I haven't made these brownies all year gasp! This next week is going to be almost too full of bake-worthy occasions, so I made these guys in advance (A whole week in advance) because they freeze and thaw amazingly well. Nobody will ever be able to tell that they weren't fresh made. I hope you get as much joy out of these brownies as I do, and that you share them repeatedly with your best friends and favorite family members -- hopefully all of them.


Now that I'm done getting sentimental about brownies, I do have some very serious notes on this recipe. The brownie batter itself is not very sweet. It's bitter and fragrant with coffee and vanilla. This is very important wo the recipe. There are so many super sweet additions that the brownies really do need the so if you're planning on using the caramel and candy technique with your own recipe, make sure your basic brownie recipe isn't overly sweet, and leans on the side of dark. Otherwise, you'll end up with a sickly sweet baked candy bar. Trust me. I've made this mistake more than once.
Oh, and make sure to keep a glass of milk within 3 inches of your plate (Or the pan if you're digging straight in) these are both fudgy and chewy. Dense + Chocolate = Thirsty.


Chewy, Caramel-ey, Nougat-ey Brownies
(Serves 16 if cut into 2 inch squares)

5 oz. Chopped dark chocolate
1 stick Unsalted butter
1 cup Light brown sugar, lightly packed
2 extra Large eggs (you can use regular large too)
1 1/2 tsp Vanilla extract
1 tsp Instant espresso or coffee
2 Tbs Sour cream or plain yogurt
1/4 tsp Salt
2 Tbs cocoa powder (Not Dutch process or the Hershey's combination stuff)
1 Cup all purpose flour
15 mini Milkey Way fun size or 24-30 minis
1/2 can Dulce de leche (cook sweetened condensed milk, covered, in a double boiler for 45-50 minutes)
1 tsp Flaked sea salt (A couple good grinds from a salt grinder will do)

For the Brownies:
Preheat oven to 350ºF.
In a microwave safe bowl, melt the chopped chocolate and butter in 20 second bursts, stirring in between. Mix in eggs one at a time, until all combined. Stir in sugar, sour cream, coffee, vanilla, and salt. Add cocoa powder and flour and stir until completely combined. Fold in 12 of the Milky Ways (if using the larger Fun Size bars, cut them in half before adding) Pour into a prepared 8x8 inch square pan. Cut the 3 remaining bars into 8ths and sprinkle over the top of the brownies. Bake for 20 minutes.

For the Caramel Topping:
Mix half (or more) of the dulce de leche with the sea salt. After the brownies have cooked for 20 minutes, top them with blobs of the salted caramel. Return to the oven and bake for 15-20 more minutes or until the brownies have just started pulling away from the sides of the pan, but are nowhere near burned. If you're not sure, go with the 15 minute mark. They're amazingly good when they're slightly under done.

Sunday, May 6, 2012

The DulceDoodle

I'm not a fan of snickerdoodles, but because I'm a good sister, and she's been begging for them for about a month now, I indulged my twinny and made snickerdoodles for this week's Sunday Sweetie. Because yesterday was Cinco de Mayo, and I cannot possibly make a cookie without some element of gooeyness, I decided to use the can of dulce de leche I'd been saving and make what three different people have told me is the best cookie in the whole wide world: The DulceDoodle.
These cookies are essentially a riff on the Argentine alfajore, which is a buttery cookie with cajeta (dulce de leche made with goat's milk) sandwiched in the middle. Alfajores are divine, by the way. Instead of a sandwich, though, this cookie is stuffed. Instead of a butter cookie, I made a not-super-sweet snickerdoodle with espresso powder and dulce de leche in the dough. Oh, and there's a special technique to really caramelize the cinnamon sugar on the outside and give it that perfectly burnt taste. Essentially, this cookie tastes blissfully foreign, but like your grandma made them at the same time. They're really, really good--and I really don't even like snickerdoodles.
Gnam Gnam!


DulceDoodles
(Makes about 20 cookies with leftover filling)

Cookie dough:
1 1/3 cup all purpose flour, plus 2 tablespoons
1 tsp cream of tartar
1/2 tsp baking soda
1/2 tsp salt
1/2 cup unsalted butter
1 egg
1 tsp vanilla extract
3 Tbs dulce de leche (straight out of the can, without the additions)
1/2 cup sugar
1/2-3/4 tsp instant coffee powder (depending on how much coffee flavor you want)

1) Cream together the butter and sugar until light and fluffy. Add the vanilla, egg, dulce de leche, and coffee and continue beating until fluffy.
2) In a medium bowl, sift together flour, cream of tartar, soda, and salt. Add to the wet ingredients in 2 batches, mixing well between batches. When combined, cool dough thoroughly (at least 3 hours in the fridge)

For the Dulce de Leche:
1 can sweetened condensed milk
1 tsp cinnamon
1/2 tsp vanilla extract
1/2 tsp milk (I used almond milk)

Rolling Sugar:
1/4 c sugar
1 1/2 Tbs ground cinnamon
1/4 tsp chili powder
(Mix all well)

1) Fill a medium sauce pan with water and completely submerge the can. Bring the water to a boil and cook the can for 3 hours. (Make sure the can is always completely submerged to prevent it from exploding and causing a whole mess of dangerous problems. If you are not comfortable with this method, there are several ways to make it with an opened can, in a slow cooker, and it is available already canned in most grocery stores, though you may have to check the international section)
2) Empty the can (minus the 3T used in the dough) into a bowl and thoroughly mix in the cinnamon, milk and vanilla. If you have time, it is easier to fill the cookies after the filling has cooled for a while and is a little thicker.

Making the Cookies:

1) Preheat oven to 400* Form the dough into rounds with a cookie scoop or spoon.
2) Split each dough ball in half and use your finger to create a dent in the middle of each half. Fill the halves with the dulce de leche, put the halves back together and roll back into a ball to seal the filling inside.
3) To really caramelize the sugar: Roll each ball in a little bit of water, then in the cinnamon sugar.
4) Place the cookies about an inch apart on a parchment lined baking sheet (preferably not greased) and bake for 10 minutes, turning the pan half way through.
5) Because the sugar caramelizes, it's hard to tell when they're finished by their color, so make sure to keep an eye on them. After removing them from the oven, they will be very soft and fragile from the filling, so let them cool on the baking sheets for about 5 to 10 minutes before moving them to a cooling rack.

6) ENJOY! Y Feliz Cinco de Mayo

Sorry for the lack of pictures, the cookies were snatched and devoured before I was able to get any shots, so I took that as a good sign, even if it does mean a slightly barren blog post.